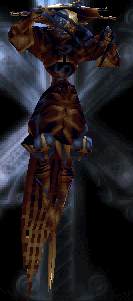
Nightmare in What Ails You, Kills You. Its 'hat' is a sun-moon disc
- Previous Area: Temple of Kiltia
- Next: Final Battle, New Game Plus
Sigils, mostly to proceed, obtained: Laurel, Acacia, Calla, Palm
The Great Cathedral is a series of obligatory battles and puzzles, with detours to find Sigils before progressing further. A trip-hop snare and synth is added to familiar music.
The numerous Elixirs and Stat Reels after boss battles, and the set of HAGANE Fluted Armor (minus Helm) are worth considering when preparing for the game's final battle. The Cathedral's eight Elixirs of Queens alone, at maximum effectiveness gives Ashley 32 more Hit Points, with Stat Reel bonuses potentially doubling that.
Ashley starts on the Ground Floor (Great Cathedral L1), but with no doors to the same level, and the Cloudstone elevator Fixated for the foreseeable future, his only path to progress lies down, into the Basement (Great Cathedral B1)
The remainder of the route through the Cathedral is similarly circuitous, going up and down levels before each floor is cleared.
If Ashley misses a jump in a room with a Cloudstone at floor level that goes down into another room, and falls down between the floor and the Cloudstone, he will not take damage and be returned to the entrance as usual, but fall to the lower room. This can work to the player's advantage when going to a lower floor, as it is not necessary to ride the Cloudstones down, if there is enough room to fall past them. It adds an additional price to accidental falls, though, as Ashley has to ride the Cloudstone back up before proceeding.
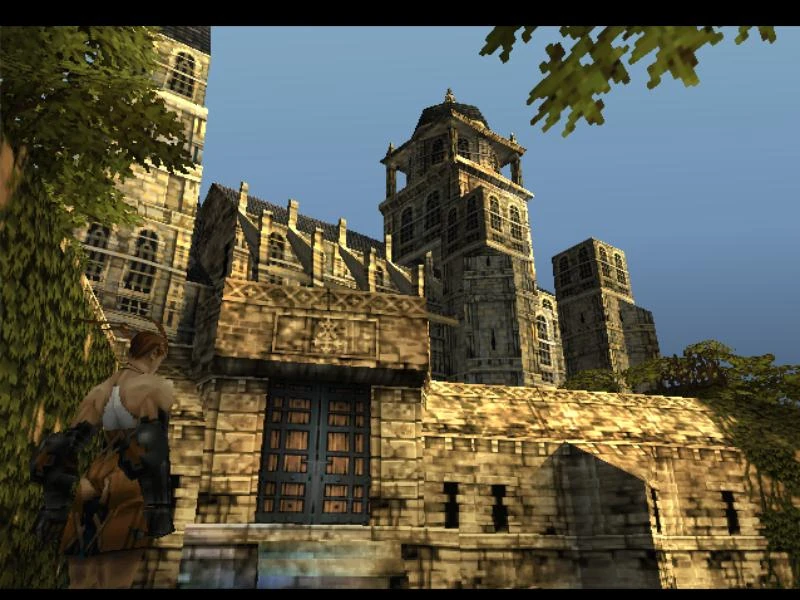
The Cathedral is first glimpsed upon exiting the Temple of Kiltia
Basement (B1)[]
Struggle for the Soul[]
No enemies
- Heal Square Trap
Exits: to Truth and Lies, straight ahead (West) and to Order and Chaos, a jump South across the gap
Truth and Lies[]
Obligatory battle: Congratulations! screen and Stat Reel
- Ifrit
Arms: Fireball. Head: Flame Sphere Lv 3, Fire Storm, Recharge 100 MP
Elixir of Queens, Grimoire Flamme 255/255
- Exits: Door whence ye entered, northeast door to The Victor's Laurels, southeast door to Sanity and Madness.
Order and Chaos[]
Obligatory battle: Congratulations! screen and Stat Reel
- Marid
Arms: Aqua Blast. Head: Avalanche Lv 3, Acid Flow, Recharge 100 MP
Elixir of Queens, Grimoire Avalanche 255/255
Sanity and Madness[]
Obligatory battle: Congratulations! screen and Stat Reel
- Iron Crab
Arms: Pincer. Mouth, Aqua Bubble. Legs: Tidal Rush
Valens, Elixir of Kings 255/255. Elixir of Queens 1/255
Unlike most other bosses, hitting is more likely when performing chains, at least the first one or two. Single hits tend to miss.
Like The Victor's Laurels room, the wall facing the water has collapsed, offering a view of a hazy sunset over the water and a natural stone cavern.
Killing the Iron Crab activates the Cloudstone Elevator to the second floor in the first room, Into Holy Battle.
The Victor's Laurels[]
No enemies.
The Cloudstone does not operate until the death of both Marid and Ifrit. This room gives access all the way up to the Third floor, once all the Cloudstones involved are activated, the route being The Victor's Laurels > Cracked Pleasures > Free from Base Desires > The Wine-Lecher's Fall. For this reason, it is usually faster to save outside in Plateia Lumitar than in
Like the Sanity and Madness room, one wall has collapsed, and the room looks out on the water through cracked masonry columns and natural stone arches.
An Offering of Souls[]
No enemies
Exit to the Ground Floor (Sin and Punishment)
Ground Floor (L1)[]
Into Holy Battle[]
Exit to Plateia Lumitar in Town Center East. Cloudstone elevator is Fixated until the Iron Crab is defeated. No enemies
Cracked Pleasures[]
No enemies
Cloudstone down to the Basement (The Victor's Laurels)
Cloudstone up to the Second floor (Free from Base Desires)
Exit door to the next room, Hieratic Recollections
Hieratic Recollections[]
No enemies
This room is tilted on its side; the West wall was its ceiling and the East wall, the floor.
The Flayed Confessional[]
Obligatory battle: Congratulations! screen and Stat Reel
- Djinn
Arms: Lightning Bolt. Head: Thunderburst Lv 3, Thunderbolt, Recharge 100 MP
Elixir of Queens, Grimoire Foudre 255/255
Single attacks hit half the time; chains are misses 75% or more often.
Defeating the Djinn activates the Cloudstone in The Poisoned Chapel, although the Sigil to proceed further is not obtained until the
Puzzle here, though an easy one, to get to the Chest, which is one Cube above the ground; destroy the Cube in the corner, giving space to come up behind the other cube and push it to the floor. Stand on it to open the Chest.
- Chest: HAGANE Fluted Armor, HAGANE Fluted Glove, Saint's Nostrum, Three Vera Potions
Where Darkness Spreads[]
No enemies
- Optional Puzzle: Move a Cube next to the Chest so it can be opened:
Jump into the pit and push the top box West. Stand on it and push a box East. Now push that Eastern box, and the middle one, both North. After that it is just a matter of lining up the two wooden boxes to stop the glowing slide cubes from sliding too far. Line them up with that center line of cubes, and let 'em slide. - Chest: HAGANE Oval Shield + Morlock Jet, HAGANE Burgonet, Elixir of Queens, Five Mana Bulbs
Dead-end Puzzle room, only accessible from An Arrow into Darkness on the Second floor. A 'sculpture' of the Rood Inverse stands like a holy symbol in an alcove to the North
Monk's Leap[]
Dead-end room, only accessible from The Acolyte's Weakness
The Skeletons will continue to spawn until the Lich is defeated, even if Ashley goes only one room away. Once the Lich is defeated, none of the three will spawn. The Lich has an impressively wide array of low level Area Effect spells. It wears all Silver Armor except for a Wizard Robe, and a Silver Shamanic Staff, none of which drops.
- Lich
Right Arm: Normal attacks, Explosion Lv 1, Thunderburst Lv 1, Flame Sphere Lv 1. Left Arm: Gaea Strike Lv 1, Avalanche Lv 1, Radial Surge Lv 1, Meteor Lv 1
Elixir of Queens, Grimoire Foudre 255/255
Laurel Sigil, Elixir of Queens, Grimoire Demolir 255/255
- Zombie Knight
Right Arm: LEATHER Reinforced Glove 8/255
- Zombie Knight
Arms: No armor. Body: BRONZE Banded Mail 8/255
Sin and Punishment[]
- Container, Magic Circle
- Curse, Eruption Traps
No enemies
Exits to Basement (An Offering of Souls) and The Poisoned Chapel
The Poisoned Chapel[]
No enemies
The Cloudstone Elevator here is Fixated until the is defeated. The door at its destination is opened with the Laurel Sigil from the Lich.
A Light in the Dark[]
Locked-door battle:
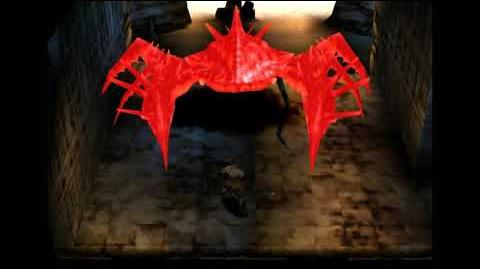
- Arch Dragon
Head: Bite, Divine Breath. Tail: Tail Attack
Acacia Sigil, Acolyte's Nostrum 255/255
Divine Breath drains Magic Points as well as doing Light damage.
Second Floor (L2)[]
The Convent Room[]
No enemies
Exit to Ground floor (Into Holy Battle) and door to next room, Abasement from Above
Abasement from Above[]
No enemies
- Poison, Paralysis, Curse Traps
The pillars on the South Side will not help with getting across and are trapped; make the jump from the door level, but not at a Northwest angle; jump straight North and then hit the left button and grab on. The center platform leads to The Hall of Broken Vows. The North Platform leads to Free From Base Desires. Jumping to it, northeast, from the center platform or back is a lead pipe cinch. Jumping from the center to the South may require stepping on the column with the Curse Trap on it, so be sure to have some Angelic Paens or Grimoire Benir/Blessing spell
The Hall of Broken Vows[]
Obligatory battle:
- Flame Dragon
Head: Bite, Searing Breath. Tail: Tail Attack
Calla Sigil, Sorcerer's Reagent 255/255. Exit to the South is locked with the Acacia Sigil from the Arch Dragon. Exit to the West leads to He Screams for Mercy. Exit to the North leads to Light and Dark Wage War
Light and Dark Wage War[]
No enemies
Levers are very rare in this game, and cause a great deal of confusion to some players. Although there was one in the Wine Cellar, it was much more obvious than this one, especially since it opens a door far away, up on the Third floor in The Heretic's Story. The lever is in the Northwest corner of this room.
The gap is jumped easily with a Faerie Wing; it may or may not be possible without one. Invigorate is said to help, also, but if so it is not enough for players with low Agility. Low Agility is recommended for crafters who want to be sure of getting hit, to raise Affinity and Class on armor.
An Arrow into Darkness[]
No enemies
- Optional Puzzle: Move a Cube next to the Chest so it can be opened:
Push the Southern glowing cube West. Position Ashley carefully to push West a second time. Push it North, to fill the gap that the other cube would otherwise fall into. Push the other cube down, and then push it next to the first cube. Positioning again, as Ashley pushes the second cube South, and South again, then West, next to the Chest
Another, longer way: Push the Southern cube west then south. Push the other cube West, West, South, East, South, and West. Pushing it East, in particular, can require a good deal of care in positioning. - Chest: HAGANE Fluted Leggings, HAGANE Fluted Glove, Five Eyes of Argon, Cure Potion
This room is open to the outdoors, although no more than a ruddy haze can be seen through the wrought-iron fence and stone columns.
The Cloudstone leads down to the dead end Puzzle room Where Darkness Spreads on the Ground floor.
Free from Base Desires[]
No enemies
Cloudstone down through the broken floor to Cracked Pleasures on the Ground floor
Cloudstone up to The Wine-Lecher's Fall on the Third Floor
He Screams for Mercy[]
No enemies
Jump North to Maelstrom of Malice, or South to The Acolyte's Weakness, which then leads to the Ground floor room with the Lich: Monk's Leap
The Acolyte's Weakness[]
No enemies
Exit to Ground floor (Monk's Leap)
Maelstrom of Malice[]
Locked-door battle:
- Lich Lord
Arms, No armor, normal attacks. Head: Radial Surge Lv 3, Drain Mind, Curse
Elixir of Queens, Elixir of Mages, Grimoire Radius 255/255
- Two Skeletons
One can drop Right Arm: LEATHER Reinforced Glove 8/255
The other, Body: BRONZE Banded Mail 8/255
Killing the Lich activates the upper Cloudstone in The Heretic's Story.
The Melodics of Madness[]
No enemies
Puzzle:Use Cubes to make a step up to gain access to the southern ledge. Push the eastern glowing cube south, then west. Push the wooden cube East, then the remaining cube South, over the other two, and down. On the lowest level, push it east, and then south to the wall and climb up.
Door to the south, to What Ails You, Kills You, locked with the Palm Sigil
What Ails You, Kills You[]
Obligatory battle: Congratulations! screen and Stat Reel
- Nightmare
Arms: Dark Chant. Head: Meteor Lv 3, Recharge 100 MP, Curse
Elixir of Queens, Grimoire Meteore 255/255
A spinning irridescent disc flies into Ashley's view from the shadows and stops, revealing the pattern of the half-sun, half-moon. It tips backwards, and the body of a Nightmare phantom, and a face similarly adorned with a symbol of duality, extends out from the disc.
Third Floor (L3)[]
The Wine-Lecher's Fall[]
Cloudstone down through the broken floor to Free From Base Desires
No enemies
Exit to next room, The Heretic's Story
The Heretics' Story[]
No enemies
Basically two rooms in one: There is no direct passage from the upper to the lower level, within this room.
- Lower level:
Exit to The Wine-Lecher's Fall
The hyperactive Cloudstones can be passed with perfect timing or decent timing and Fixate. Where long jumps require the forward button to be held down before the jump, the opposite is true of short ones; jump then tap the directional button.
Exit to Hopes of the Idealist
- Upper level:
The North-South Cloudstone is activated by killing the Lich. The upper level door is opened with a lever in Light and Dark Wage War. Exits to and (locked with the Calla Sigil)
Hopes of the Idealist[]
Obligatory battle: Congratulations! screen and Stat Reel
- Dao Earth Elemental Phantom
Arms: Vulcan Lance. Head: Gaea Strike Lv 3, Gravity, Recharge 100 MP
Palm Sigil, Elixir of Queens, Grimoire Gaea 255/255
- Cutscene after the battle: Sydney returns to the wounded Hardin, Callo Melrose, and the Duke's son. Guildenstern, having stabbed Hardin when his back was turned to more important business, prefers to gloat over what he perceives as Sydney's betrayal of Hardin; leading Mullenkamp to believe that their presence in the city was to find the Blood-Sin, when it was on Sydney's back all along. Sydney begs Hardin's forgiveness; Guildenstern gives an inspired accounting of his reasons for wanting the Blood-Sin to purge the 'suppurating' land of 'profiteers'.[1] Sydney feels the truth of the future Guildenstern seeks is a little different than he expects: "A tyrant always dies alone", he predicts. When Guildenstern, having already used the Dark on Sydney, promises to take what he wants by force, even the silent watcher Callo Melrose is moved to object; "If the soul is not true and fast, the rites are meaningless", she warns.[1] Lady Samantha calls out of the shadows, possibly to distract Sydney; he strikes her to the floor with the Dark and perhaps unwisely, turns his back on Guildenstern to teleport his allies to safety. Sure enough, just as he completes the spell, Guildenstern strikes again; vowing, as Sydney falls, to carve the Rood Inverse from his back.[1]
Despair of the Fallen[]
Cloudstone down to What Ails You, Kills You
No enemies
Exit North to the upper level of The Heretic's Story
Where the Soul Rots[]
South exit to The Heretic's Story, upper level
No enemies
Cloudstone up to The Atrium
Fourth Floor (L4)[]
The Atrium[]
- Magic Circle
No enemies
Dome of the Cathedral[]
Great Cathedral Dome[]
Guildenstern is Evil. And Evil Class, too. See Character Discussion
The Penultimate Transformation is very resistant to chains. It wears Silver Fluted Leggings, a Titan's Ring, and a Damascus Holy Win Great Sword, none of which ever drop
- Guildenstern (Penultimate Transformation)
Arms: Normal attacks, Last Ascension attack
Head: Dispel, Stun Cloud, Tarnish
Great Cathedral Paling[]
The Final Transformation can be chained. It is said that the Menu (triangle) or the Quick Menu (Left 2) can be accessed during the casting of Bloody Sin, which seems only fair, as it takes a long time to cast and is the developer's best chance to show players the Game Over screen.
- Guildenstern (Final Transformation)
Right Arm: Thunderbolt, Fire Storm, Degenerate, Psychodrain
Left Arm: Gravity, Acid Flow, Leadbones, Tarnish
Head: Judgment, Apocalypse, Silence, Curse
Body: Bloody Sin
External Links[]
- * Vagrant Story Maps
- Vagrant Story part 17(of 21) Daevas
- Vagrant Story part 18(of 21) Revolution
- Vagrant Story part 19(of 21) Ascension
- Vagrant Story part 21(of 21) The Vagrant
- Vagrant Story part 20(of 21) Succession
See Also[]
Citations[]
- ↑ 1.0 1.1 1.2 Vagrant Story part 18(of 21) Revolution Vagrant Story, 2000