
Vagrant Story, the Fandub – 4 – An Incomplete Death
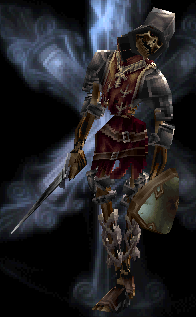
Catacombs and Sanctum cutscenes, including the pictured glimpses of the Cardinal's forces on the surface
- Previous Area: Wine Cellar
- Next Area: Sanctum of Leá Monde
As one might expect of a repository for the remains of the dead of centuries, Leá Monde's catacombs spawned much more than their fair share of the Undead when the Dark consumed the city. Ashley might take advantage of this by using one weapon to fight them, and one to fight the Beasts that destroy their valuable, if common, Undead Affinity. See Three Weapons
If that is not enough Undead Affinity (100 is the maximum), an Undead Dummy spawns in Hall of Sworn Revenge, but only once Ashley has left Leá Monde's Catacombs and entered the Leá Monde's Sanctum.
Three of the eleven Starting Weapons are found here, six in the Wine Cellar, one in the Sanctum, two in Western Town Center. Three of the best: Broad Sword, Scramasax and Glaive, come from The Lamenting Mother, The Bandit's Hideout and The Beast's Domain respectively. The other best Starting weapon is Rapier, found in the Wine Cellar.
Trigger conditions are cumulative, ie all of those that are true will result in triggered events, unless otherwise stated. A large number of triggers depend on Ashley reaching the final room of the area: The Beast's Domain (so there will be different enemies spawning on the return trip back to The Withered Spring and the exit to Sanctum
> Means "greater than". HP > 200 is a condition not satisfied by HP 200, only 201 or more. > = Means "greater than or equal to". A condition requiring 200 or greater HP would be HP > = 200.
< Means "less than". HP < 200 is a condition not satisfied by HP 200, only 199 or less. < = Means "lesser than or equal to". A condition requiring 200 or greater HP would be HP > = 200.
The power of magic in Leá Monde has been twisted by a cataclysmic death ritual, creating The Dark which raises Undead
Hall of Sworn Revenge[]
Exit to Wine Cellar
- Container (anything stored here can be retrieved from similar containers throughout the game)
- Magic Circle (Save and later, Teleport). Save is recommended for slower, more deliberate players, due to the upcoming Timed Battle in The Lamenting Mother
- Heal Square, Cure Square Traps
- Training Dummy (Undead)
- Trigger 1: Ashley enters Sanctum
- 999 HP and 200 all resists, always drops Cure Potion and Mana Potion. Drops Elixir of Kings (+Strength) 13/255 chance
The Last Blessing[]

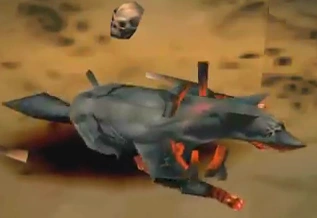
The Hellhound glows as though red hot, and, rotating around its neck, a segmented "collar" glows as well
- Mutually exclusive triggers (both conditions cannot exist simultaneously)
- Trigger: Ashley's Hit Points > = (greater than or equal to) 150: Bat appears
- Trigger: Ashley's Hit Points = < (equal to or less than) 149: Slime appears
The Weeping Corridor[]
- Freeze Trap
- Mutually exclusive triggers (both conditions cannot exist simultaneously)
- Trigger: Ashley's Hit Points > = (greater than or equal to) 200: Hellhound appears
- Trigger: Ashley's Hit Points = < (equal to or less than) 199: Slime appears
- Hellhound
- Slime
- One Arm Skeleton. Head and Arm: no armor.
- Loot drop: Faerie Chortle 25/255 chance
Persecution Hall[]
- One Arm Skeleton. Head and Arm: no armor
- One Arm Skeleton. Trigger: HP > = 200. Head and Arm: no armor.
- Bat. Trigger: HP > = 200. Cure Root, 38/255
- Slime. Trigger: HP = < 199.
Rodent-Ridden Chamber[]
- Chest: "Pink Squirrel" weapon: IRON Goblin Club (Wooden Grip), Cross Guard, LEATHER Cuirass, LEATHER Long Boots, Iocus, Three Mana Roots, Three Cure Bulbs
- Skeleton. Legs: no armor.
- Ghost (Attenuated Manifestation) (46 HP). Trigger: Ashley defeats the first Ghost at The Lamenting Mother. Arms cast Mind Blast. Head casts Lightning Bolt, Degenerate.
- Grimoire Teslae, 8/255
Shrine to the Martyrs[]
- Hellhound. Cure Root, 25/255
- One Arm Skeleton. Trigger: HP > = 200. Head and Arm: no armor.
- Bat. Trigger: HP = < 199.
- Bat. Trigger: Ashley defeats the first Ghost at The Lamenting Mother.
The Lamenting Mother[]
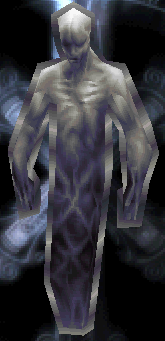
A Ghost, which is Phantom Class. Silver weapons are good against undead as well, but they are best saved for phantoms, which are extremely hard to hit
- Cutscene when Ashley moves to the center of the room
- Ghost appears A timer starts. Ashley can open the chest in this time, and the timer pauses, too. The contents of the chest can only be obtained once.
- Timed Battle: Kill the Ghost within 30 seconds or it is Game Over. At least Ghosts do not have Chain Evade as their greater Phantom cousins do.
- Ghost (Vindictive). Arms cast Mind Blast. Head casts Solid Shock and Degenerate.
- Three Cure Bulbs, 255/255 (always). Elixir of Kings, 255/255 (always)
- Cutscene when Ashley defeats the Ghost
- Earthquake
- The room's structure is markedly changed after Ashley kills the first Ghost, leaves and returns. If Ashley loots the chest in the first version of the room (pre-quake), it will be empty in the second (post-quake).
- There is only one of these stronger Ghosts, at one time, in the entire game. Once this first version is defeated, the other appears in its place on subsequent visits. They differ only in the loot they carry. The Silver Scramasax in a chest in the nearby Bandits' Hideout room is very useful against Phantoms
- Chest pre-quake: "Shandy Gaff" weapon: BRONZE Broad Sword (Swept Hilt), BRONZE Knuckles, Elixir of Queens
The Lamenting Mother (earthquake struck)[]
- Chest post-quake: "Shandy Gaff" weapon: BRONZE Broad Sword (Swept Hilt). BRONZE Knuckles, Elixir of Queens
- Ghost (Vindictive). Trigger: Ashley defeats the first Ghost at The Lamenting Mother. Arms cast Mind Blast. Head casts Solid Shock and Degenerate.
- Grimoire Zephyr, 8/255
- One Arm Skeleton. Head and Arm: no armor. Trigger: Ashley defeats the first Ghost at The Lamenting Mother.
- One Arm Zombie Knight. Trigger: Ashley defeats the first Ghost at The Lamenting Mother. Body and Arm: no armor.
Hall of Dying Hope[]
- Zombie Knight. Trigger: HP > = 175.
- LEATHER Reinforced Glove, 8/255. BRONZE Chain Coif, 8/255. BRONZE Langdebeve (Sand Face grip), 8/255
- Slime. Trigger: HP = < 174
- One Arm Zombie Knight. Body: no armor.
- BRONZE Chain Coif, 8/255. IRON Light Greave, 8/255. IRON Spatha (Swept Hilt), 8/255
- Skeleton. Trigger: Ashley enters The Beast's Domain. Arms and Legs: no armor.
- IRON Bone Helm, 8/255. Cure Tonic, 12/255
Bandits' Hideout[]
The Silver Scramasax in the chest should be used exclusively against Phantoms and Humans; the Undead it also has a bonus against will reduce the valuable Phantom bonus too much.
- Chest: "Soul Kiss" weapon: SILVER Scramasax (Swept Hilt grip), BRONZE Targe, BRONZE Knuckles, LEATHER Bear Mask, Haeralis gem, Three Spirit Orison, Three Eye of Argon
- Hellhound. Area effect special attack: Fire Breath. Mana Bulb, 12/255
- Bat. Vera Root, 52/255
- Ghost (Attenuated Manifestation). Arms cast Mind Blast. Head casts Fireball, Psychodrain.
- Grimoire Incendie, 8/255
The Bloody Hallway[]
No enemies
Puzzle Cube:
- Lift the wooden cube on the left onto the wooden cube nearest the raised level
- Climb up and lift the wooden cube off the top.
From here, two possible solutions:
- More complex stuff on the second lower area that ends up with the stone cube and wooden cube stacked in front of the door.
- Drop the wooden cube and push it onto the stone one already below. This should be high enough to jump off of and catch hold
Faith Overcame Fear[]
- One Arm Skeleton. Body, Legs: no armor.
- Zombie Knight. Trigger: HP > = 175.
- Slime. Trigger: HP = < 174
The Withered Spring[]
Exit to Prisoner's Niche in Sanctum of Leá Monde, locked with Lily Sigil, held by enemy in The Beast's Domain. Exiting into Sanctum makes the Undead Dummy appear in Hall of Sworn Revenge
The triggers make one set of enemies stop spawning when Ashley enters The Beast's Domain and start another set spawning once he enters the Sanctum. There are a couple of potentially desirable items dropped by one of the first set of enemies. In between those times, the room will be empty of enemies.
A Hauberk is dropped by the Ghoul here, and nowhere else in the game. Like all or almost all first and second Tier items, it can only be crafted with Mismatches of higher Tier items.[1] However, it is neither required for any combinations, nor can any combinations be made with it that do not result in a copy of one of the two ingredients.
A Dirk is dropped here by the same Ghoul, and is the only one in the game, dropped or in chests. Dirks can be relatively easily made, of course, but unlike the Hauberk, it is very useful in combinations: those wishing to Devolve other weapon Designs into a Battle Knife will want a Dirk to make a Throwing Knife (then Scramasax + Throwing Knife = Kudi)
- One Arm Zombie Knight. Trigger: Spawns before Ashley enters The Beast's Domain.
- Ghost (Attenuated Manifestation). Trigger: Ashley enters Sanctum + Ashley enters The Beast's Domain. Arms cast Mind Blast. Head casts Vulcan Lance, Leadbones.
- Grimoire Terre, 8/255.
- One Arm Skeleton. Trigger: Ashley enters Sanctum + Ashley enters The Beast's Domain. Body and Arm: no armor.
Workshop "Work of Art"[]
See Combine, Class, Affinity and Type and the other articles in the Workshop category for details about Combining weapons and armor
- Magic Circle: Save and later, Teleport
- Container. Items stored here can be retrieved from any Container in the game.
"WOOD LEATHER and BRONZE can be crafted here"
So says the 'sign above the door as you come in', anyway. But the fourth Tier of Leather (Bone Helm, Cuirass, Knuckles, Cuisse) is missing two crucial drops: Knuckles and Cuisse. They will not be in Ashley's inventory, now or ever, unless they are crafted. This tends to make "Work of Art" more of a place where BRONZE and WOOD can be crafted, but there are a few ways around it. One is to just forget Leather, and combine it with Bronze. The other is to make use of Bone Helms to create the Knuckles and Cuisses; once these are made, the third Tier Reinforced Glove and Long Boots can be made into something a little special: Fifth Tier Leather. A player that manages to make these is definitely one of a pretty select group. Leather Chainmail, anyone?
Bone Helm + Cuirass = Cuisse. Cuisse + Bone Helm = Knuckles. And Cuise + Knuckles = Bone Helm. Just kidding on the last part, seeing if the readers are paying attention. So do not do that. Just the first two.
And then the third Tier stuff added to make the fifth:
Cuisse (4th) + Long Boots (3rd) = Light Greave (5th).
Pretty nifty, but the next bunch of combination can get a lot of mileage out of Reinforced Gloves. Chances are there will not be enough of them.
Knuckles + Reinforced Glove = Ring Sleeve
Ring Sleeve + a new Knuckles = Chain Sleeve
Back to Reinforced Glove again with:
Chain Sleeve + Reinforced Glove = Gauntlet
The stuff below third Tier is pretty much useless. There are few if any combinations below third that actually make anything other than an Equal combination, where the result is the same as one of the ingredients. First and second Tier Leather cannot be combined for an increase in Tier like third and fourth do, nor does second + third make fourth.
This would be a good time to start paying attention to the way in which the Affinities and Classes and Type bonuses combine when armor and weapons are combined. With Affinities and Classes, two numbers always stay the same: the highest value, and the lowest, unless those are on the same Class or Affinity, in which case all the high ones are retained, which is a good thing to try to achieve. The rate for the rest is A + B times 80%, or 60%, or 40% No one seems to know the factors that make a particular combination give 80% or 60% or 40% other than the developers, and they are not telling.
Weapon combinations are counterindicated until the player has a really good idea what they are doing with Affinities and Classes. Only one thing is necessary to do with weapons at the start, and it should be done as soon as possible. Designate (renaming helps) each of Three Blades a separate task. One is for killing Humans and Phantoms. One is for killing Beasts and Dragons. The third is for killing Undead and Evil. As long as this format is adhered to, Ashley's weapons will never ever lose Class points. Elemental affinities will come and go, perhaps making Physical dwindle away to a minus, or Physical may grow and push out hard-won Elemental affinities, but the most precious resource of all, Class, will only get stronger and stronger. A popular alternate strategy for Three Blades is to keep all three Types (Pierce, Slash, and Blunt) and exploit enemy weaknesses.
Repent, O ye Sinners[]
Two mutually exclusive triggers, and a location trigger:
- Slime. Trigger: HP = < 174.
- Skeleton. Trigger: Ashley enters The Beast's Domain.
- Bat Cure Root, 52/255.
The Reaper's Victims[]
Trigger: First visit: Door is locked until enemies are killed. No timer
- One Arm Zombie Knight. Trigger: Spawns on first entry, never thereafter. Locked-door battle, no timer. Three Cure Bulbs, 255/255 (always)
- Bat. Trigger unclear. Seems to accompany the One Arm Zombie Knight in the first-visit battle. Locked-door battle, no timer, "on the first visit after entering the area" (area as in Catacombs, which is redundant, or area as in room, which would be second visit?).[1] Cure Tonic, 8/255.
- Mummy. Trigger: second and subsequent visits, before Ashley leaves the Catacombs.[1] Cure Root, 25/255
- Bat. Trigger: second and subsequent visits, before Ashley leaves the Catacombs.[1] Vera Bulb, 25/255
The Last Stab of Hope[]
Mutually exclusive triggers, location trigger
- Skeleton. Trigger: HP > = 180. Arms and legs, no armor.
- Slime. Trigger: HP = < 179
- Hellhound. Trigger: spawns once The Beast's Domain is entered. Vera Root, 8/255
- Skeleton.
Hallway of Heroes[]
Mutually exclusive location triggers
- Zombie Knight. Trigger: spawns until first entry into The Beast's Domain.
- Skeleton. Trigger: spawns after first entry into The Beast's Domain.
The Beast's Domain[]
Two Lizardman with a little over 25% more Hit Points than the normal Lizardman enemies. One drops the Lily Sigil required to exit the Catacombs into Sanctum. Both drop Polearm weapons at 100% chance. Arguably, any 100% drop weapons in the early game are Starting Weapons, but since the Spear is a duplicate of the fifth guaranteed blade, it is not counted as one. The other blade is the ninth Starting Weapon, the Glaive. Triggers spawn them once, and replace with three Slimes thereafter
- Lizardman Ambusher. Trigger: first entry only. Arms and legs, no armor
- Lizardman Ambusher. Trigger: first entry only. Left arm and legs, no armor
- Three Slimes. Same stats, attacks, trigger (spawn on second and subsequent visits) and loot: Faerie Chortle, 48/255
Exit[]
The exit to Sanctum is back in The Withered Spring. Exiting into Sanctum makes the Undead Dummy appear in Hall of Sworn Revenge
Notes[]
Redundant condition: Until Ashley enters The Beast's Domain, he cannot enter the Sanctum, but the Ghost, Mummy, and Skeleton only commence spawning in The Withered Spring room once he has entered both the Sanctum and The Beast's Domain.
Gallery[]
")
")
")
Links[]
See Also[]
- ↑ 1.0 1.1 1.2 1.3 Vagrant Story: Enemy FAQ by JTilton